Free Farmhouse Table Plan
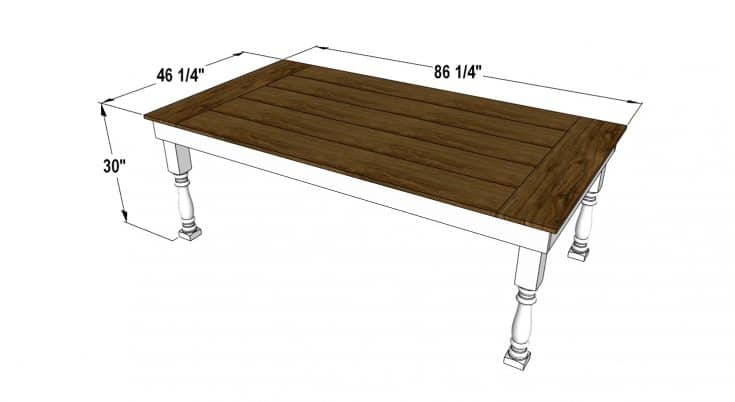
This Free Farmhouse Table Plan is easy, affordable, and can be made in one afternoon with standard size boards from your local lumbar yard.
Materials
- 4 pcs 4” x 4” x 40” Wooden Deck Post
- 1 pc 2”x4”x8’
- 1 pc 4”x4”x8’
- 7 pcs 1”x10”x60”
- 3 pcs 1 ¼”x6”x7’ 0
- Wood Glue
- Plugs
- White Paint
- Stain
- Polyurethane
- Pocket Hole Screws
Tools
- Tape Measure
- Speed Square
- Pencil
- Safety Glasses
- Drill
- Nitrile Gloves
- Paint Brush
- Sandpaper
- Circular Saw
- Hand Saw
- Clamps
- Pocket Hole Jig
- Large Clamps
Optional
Instructions
Overall size:
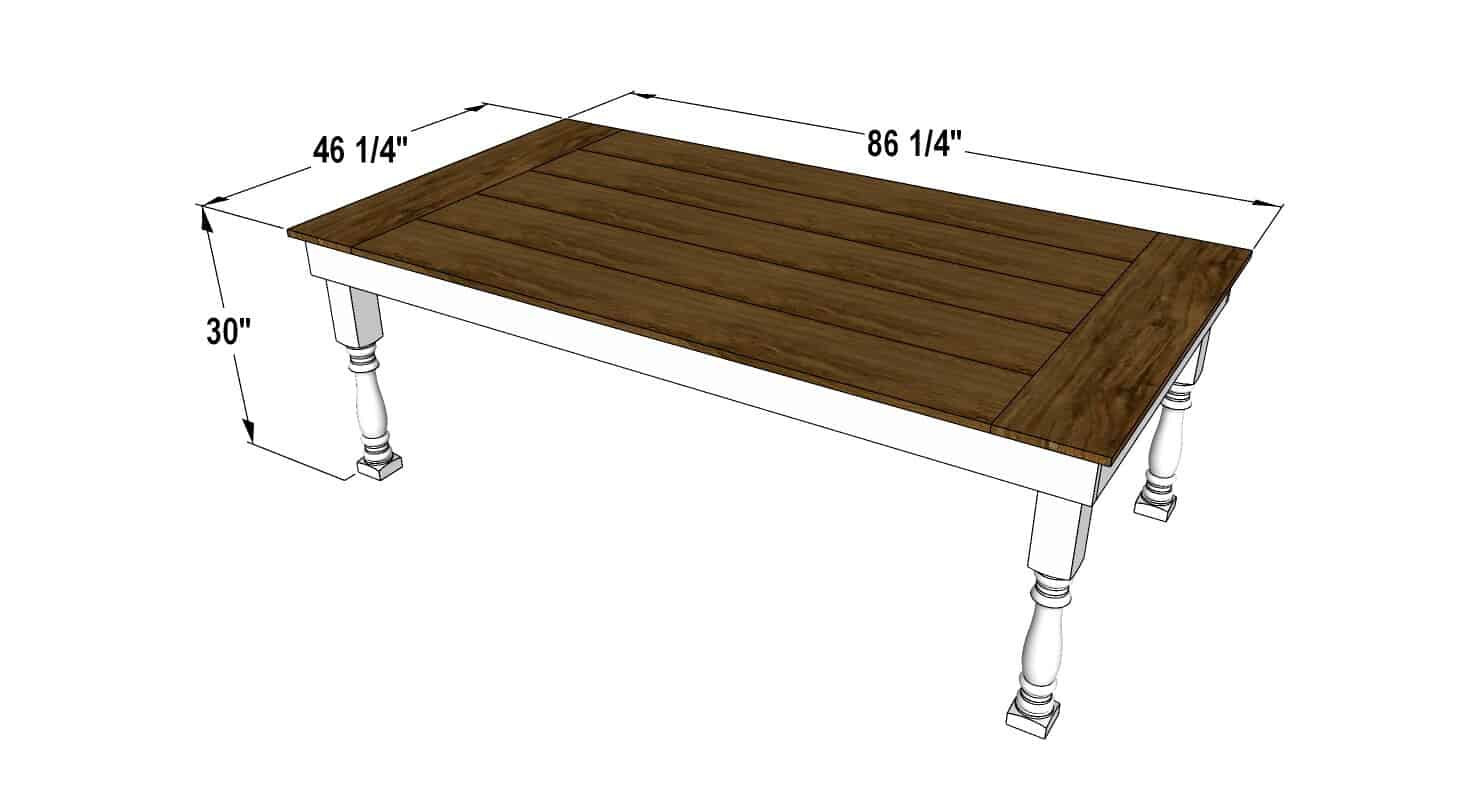
NOTE:
Be sure to glue each joint before screwing together.
Step 1
Start by cutting all the pieces to size. This build uses lumber very efficiently and you will only need to make a few cuts for this table.
Cut list:
Cut 2 pcs 2”x4”x42”
Cut 2 pcs 4”x4”x42”
Cut 2 pcs 1 ¼”x6”x42”
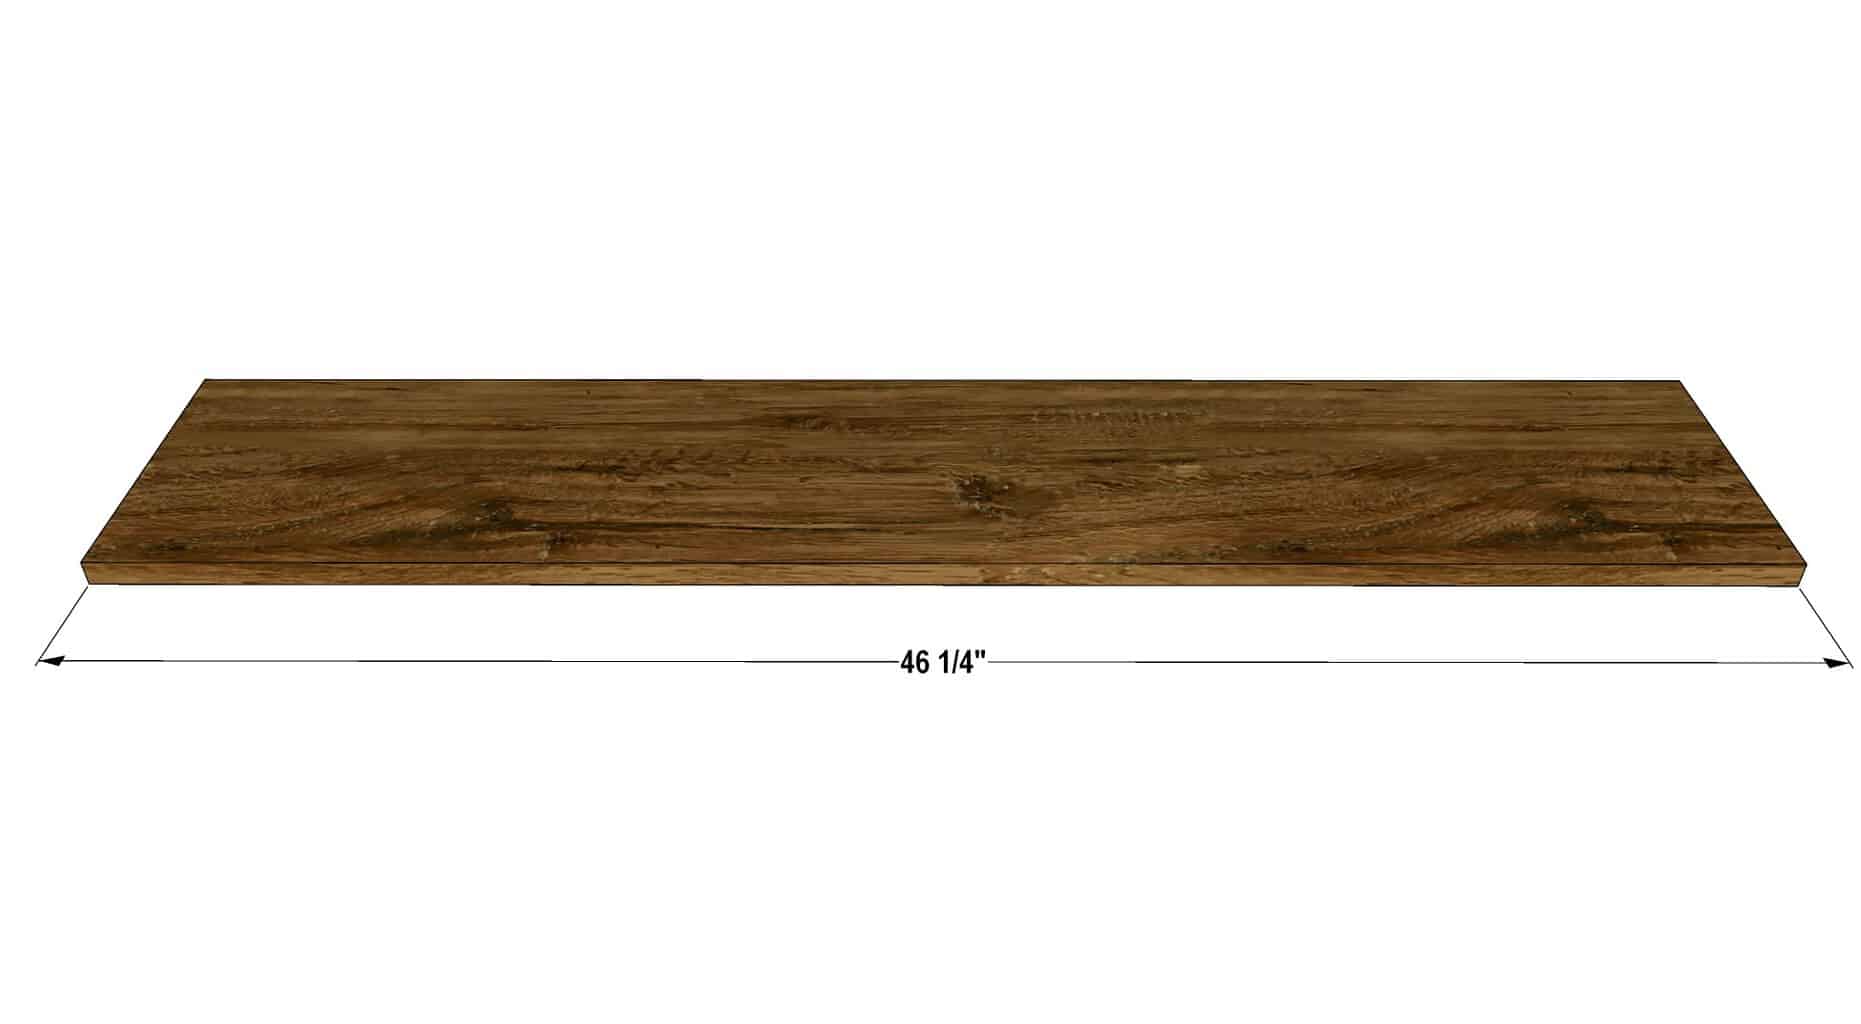
Cut 2 pcs 1”x10”x46 ¼”
Cut 2 pcs 1 ¼”x6”x84”
Step 2
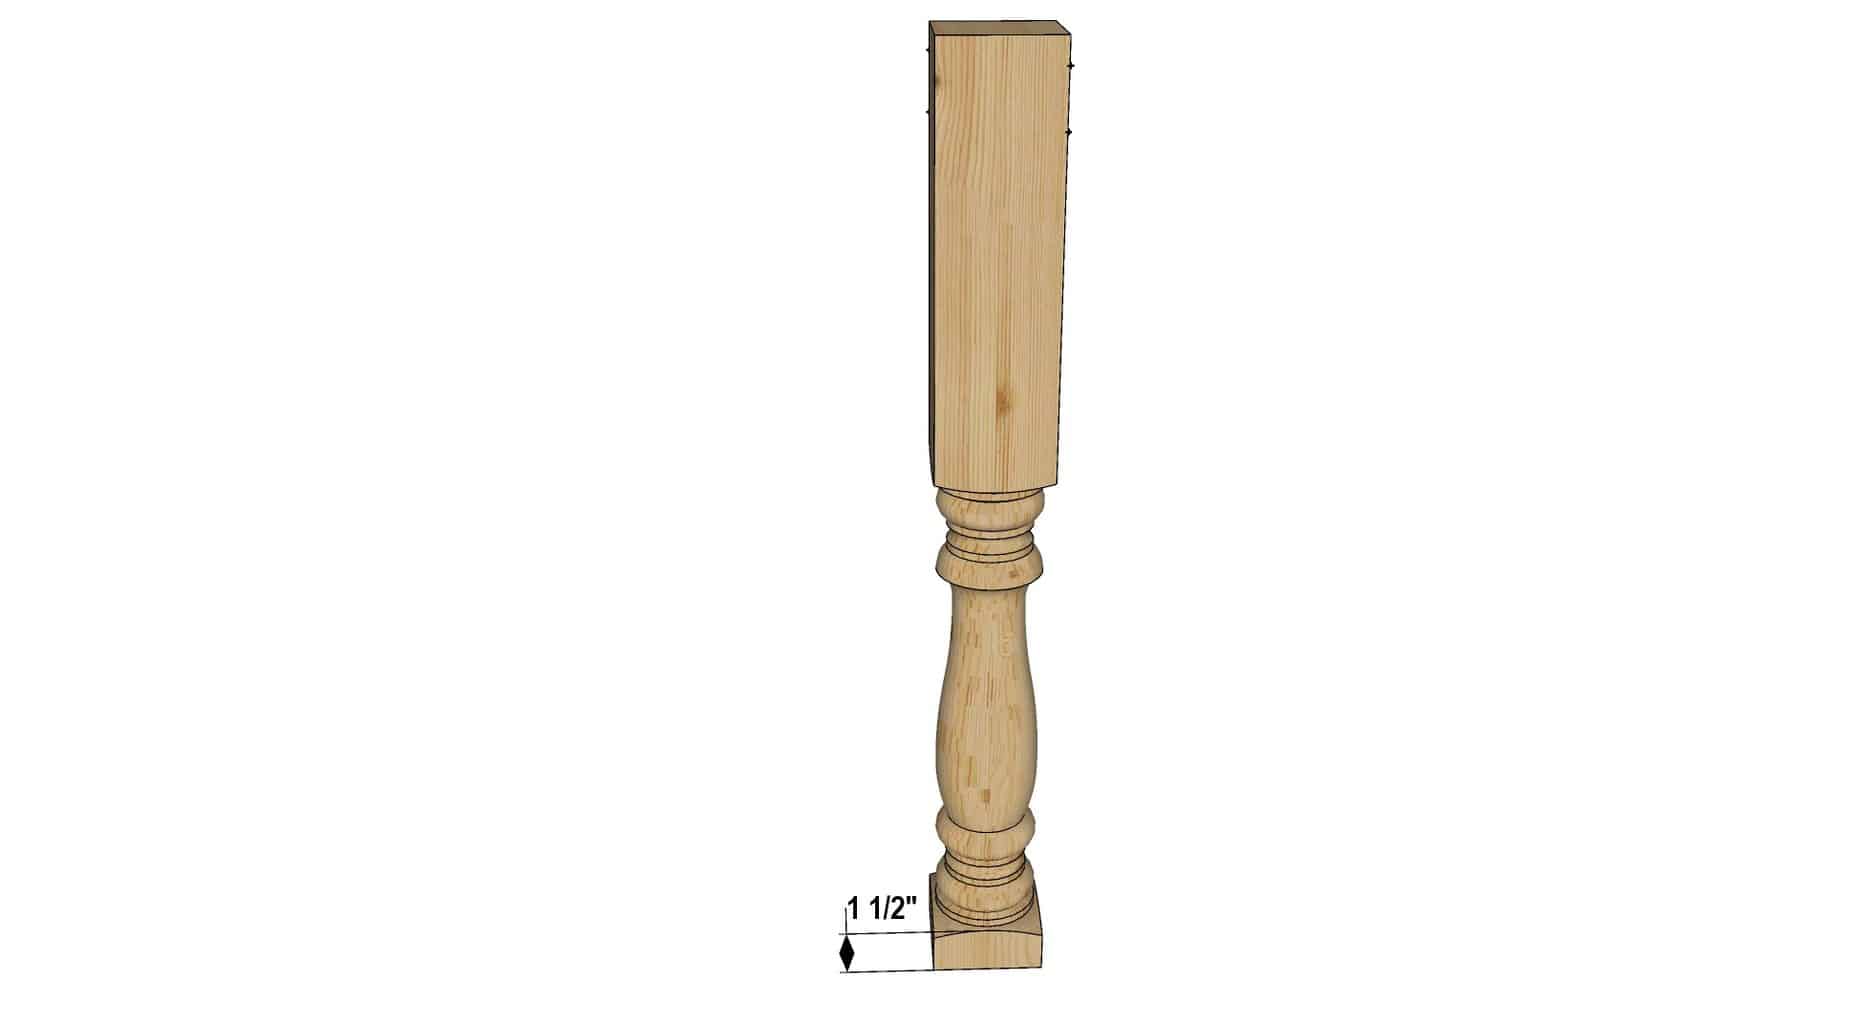
Cut one end (or both) of the 4” x 4” deck posts. Just locate the shaped part of the post where you like it.
It starts out roughly like this:
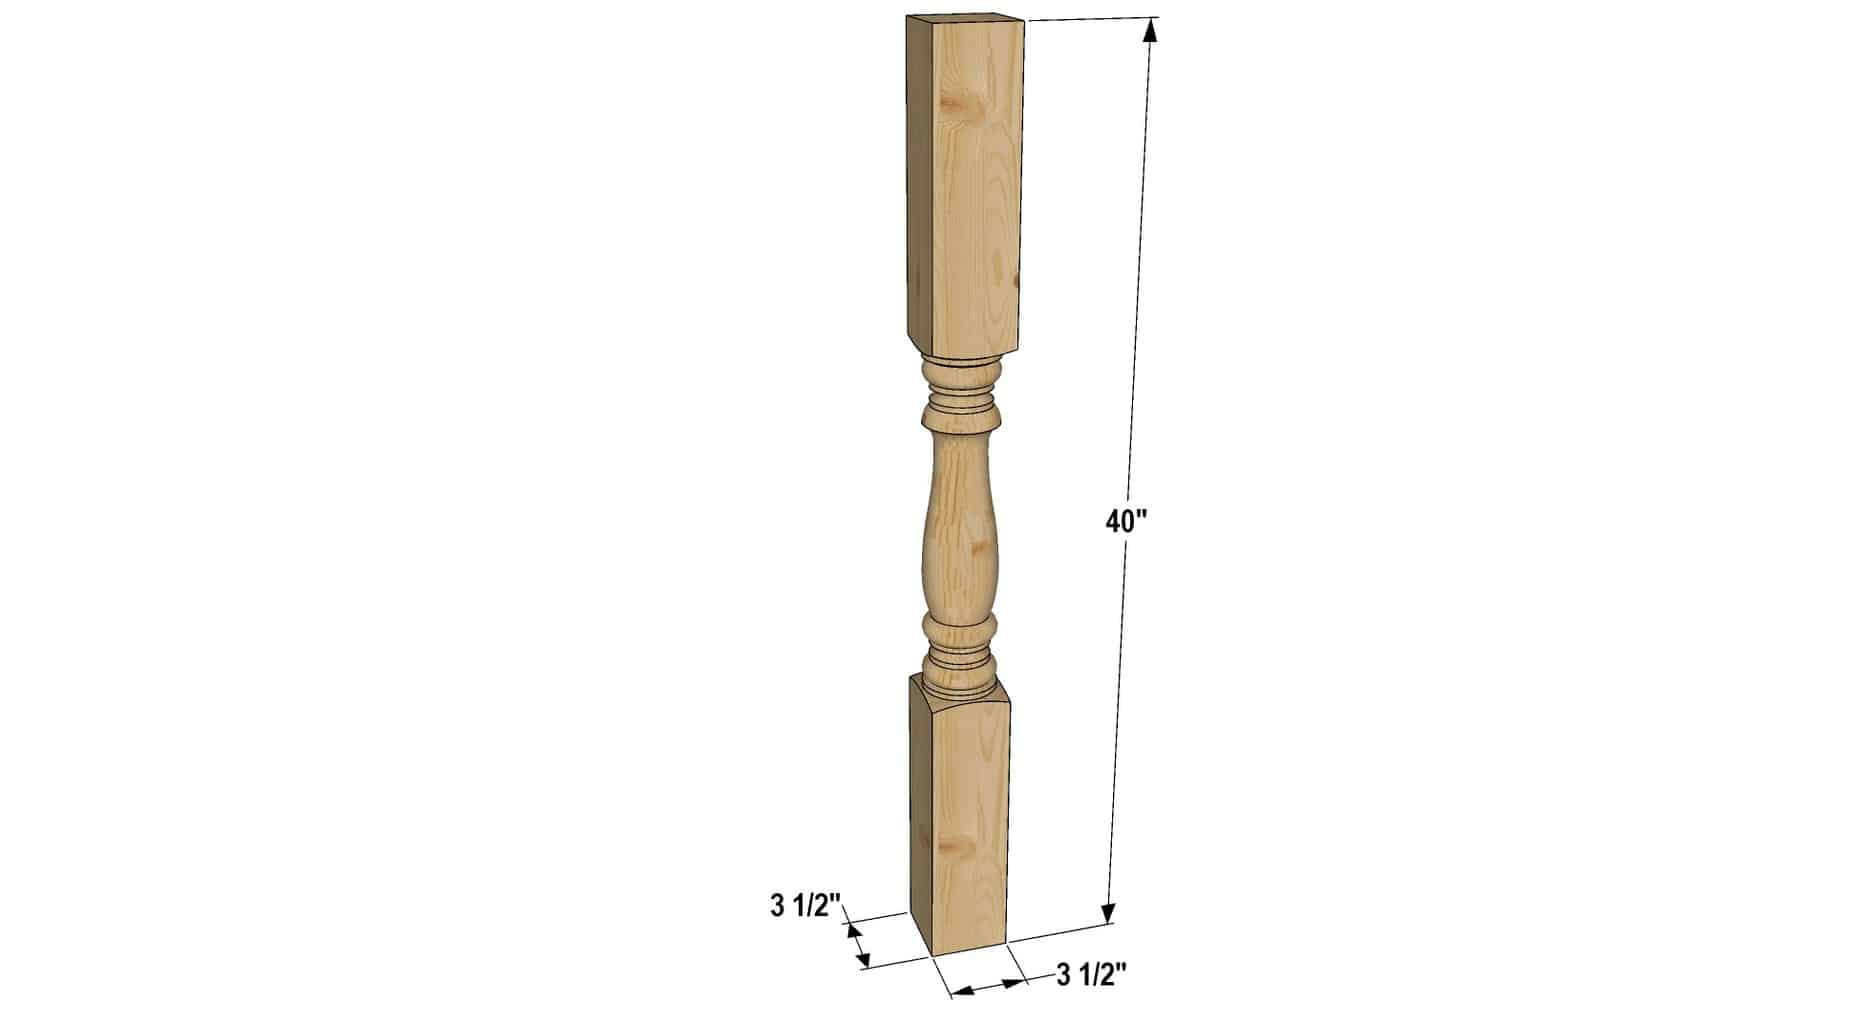
We left about 1 ½” of the flat part of the leg underneath the shaped portion of the post, to serve as the bottom of the table leg like this:
Step 3
Add 4 pocket holes to the top of all 4 legs like this:
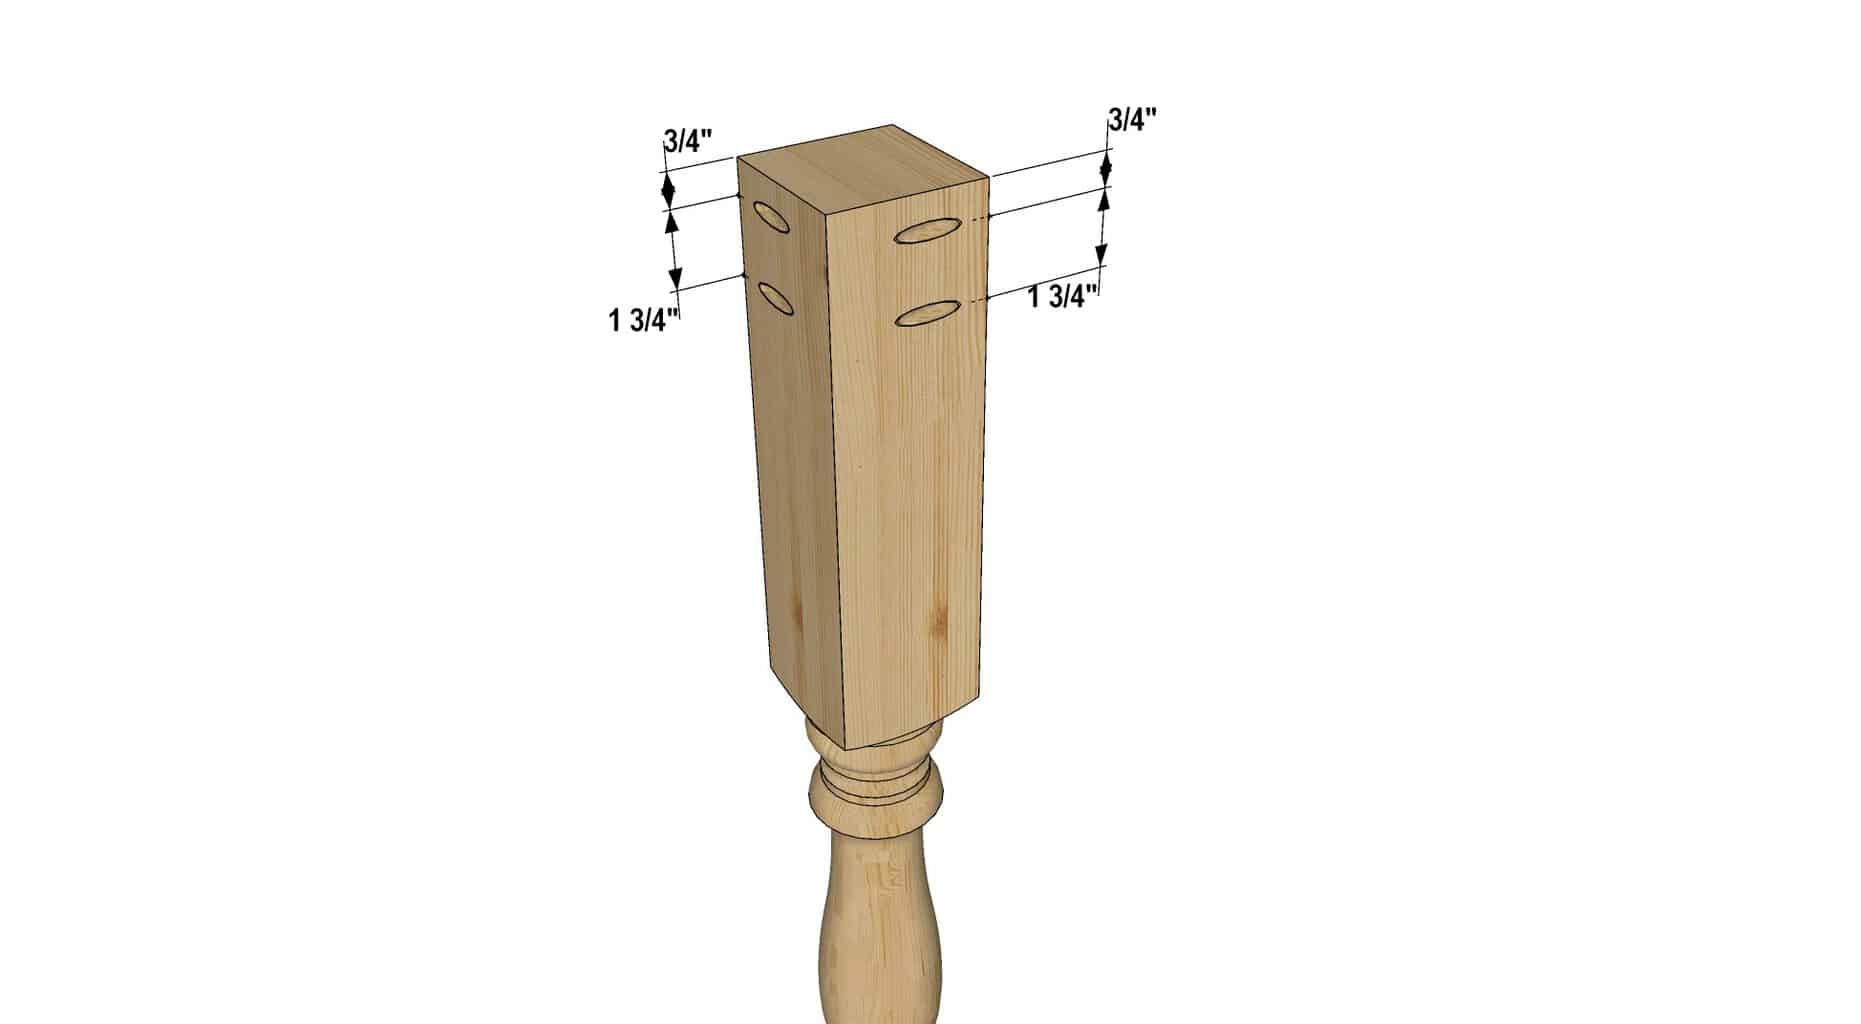
NOTE: It depends on which pocket hole jig you're using so just set it up as per the instructions
Step 4
Take 2 of the legs and one 1 ¼”x6”x42” board and screw them together using pocket holes screws after gluing. Pretty important to glue this before screwing as this is a critical joint of the table :)
You might even want to bolt this joint; we didn’t, and our family of 8 has used this table for over 2 years at the time I wrote this post.
The ends of the board should align with the legs. Make sure everything is square and both legs are parallel.
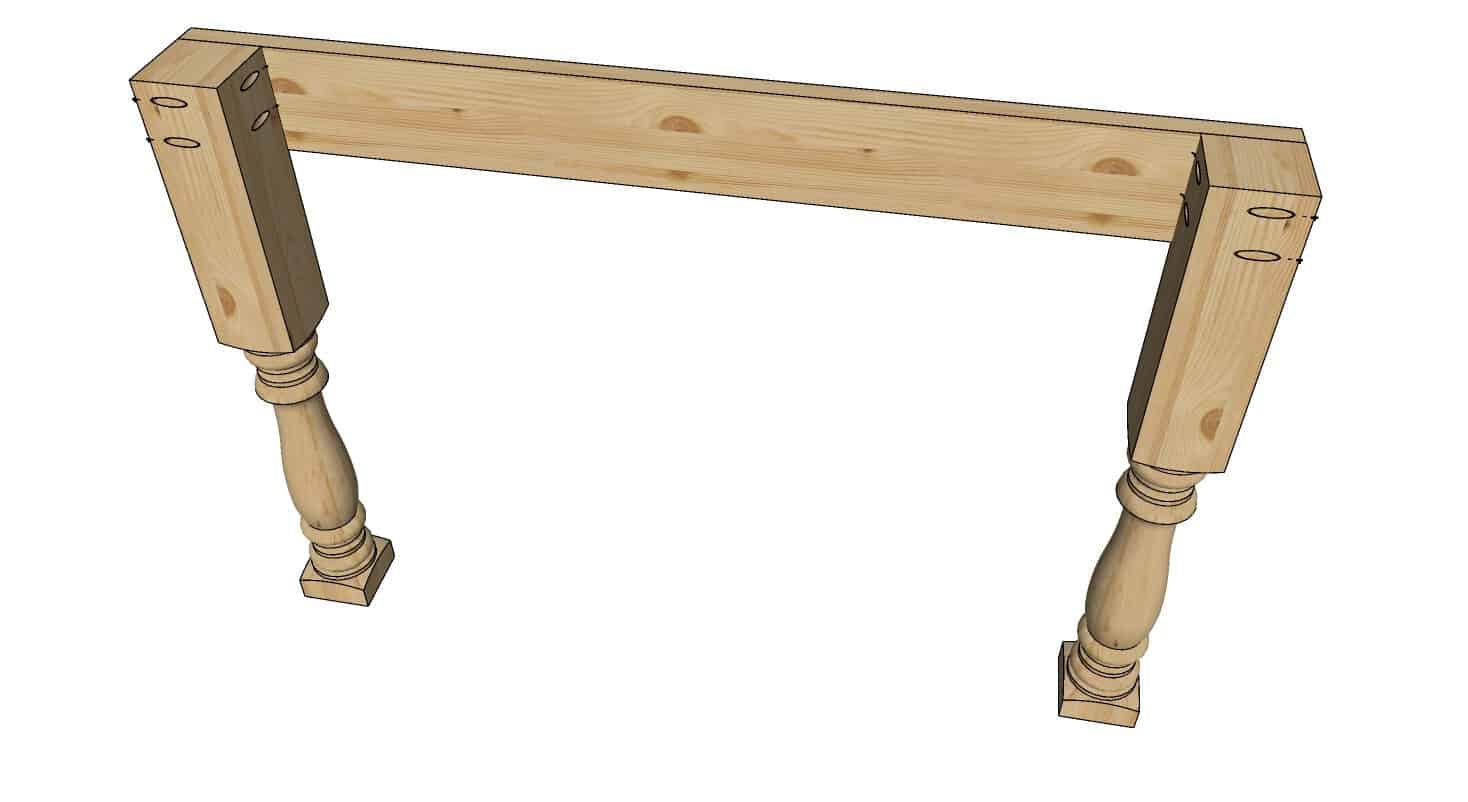
Repeat the same step with other 2 legs and 1 ¼”x5”x42” board.
Step 5
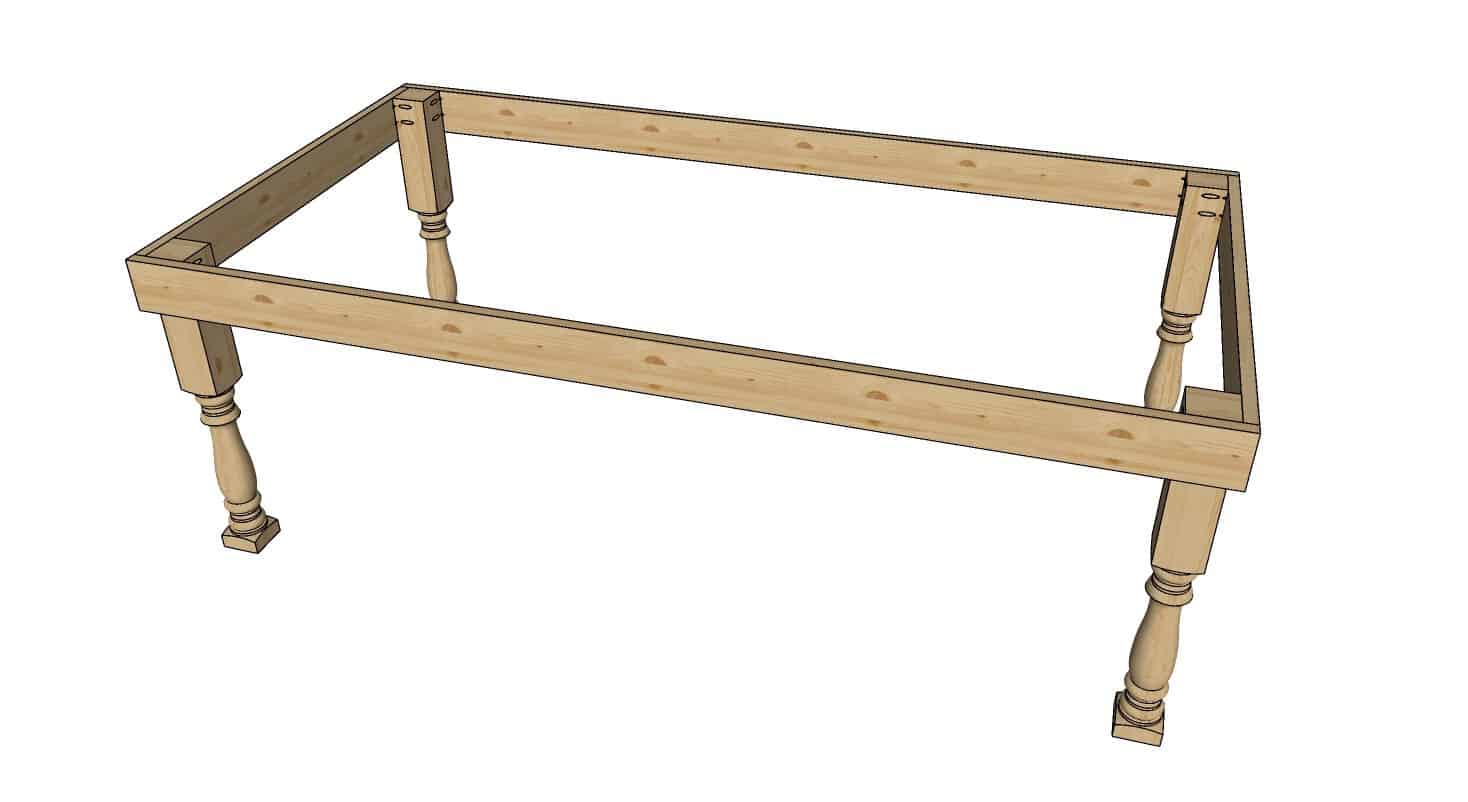
Use the 2 leg assemblies made in previous steps and two 1 ¼”x6”x84” boards to make tables frame.
Joint these pieces using pocket holes in the legs of the table.
The end of the boards should align with the ends of shorter boards on the leg
assemblies as shown.
Step 6
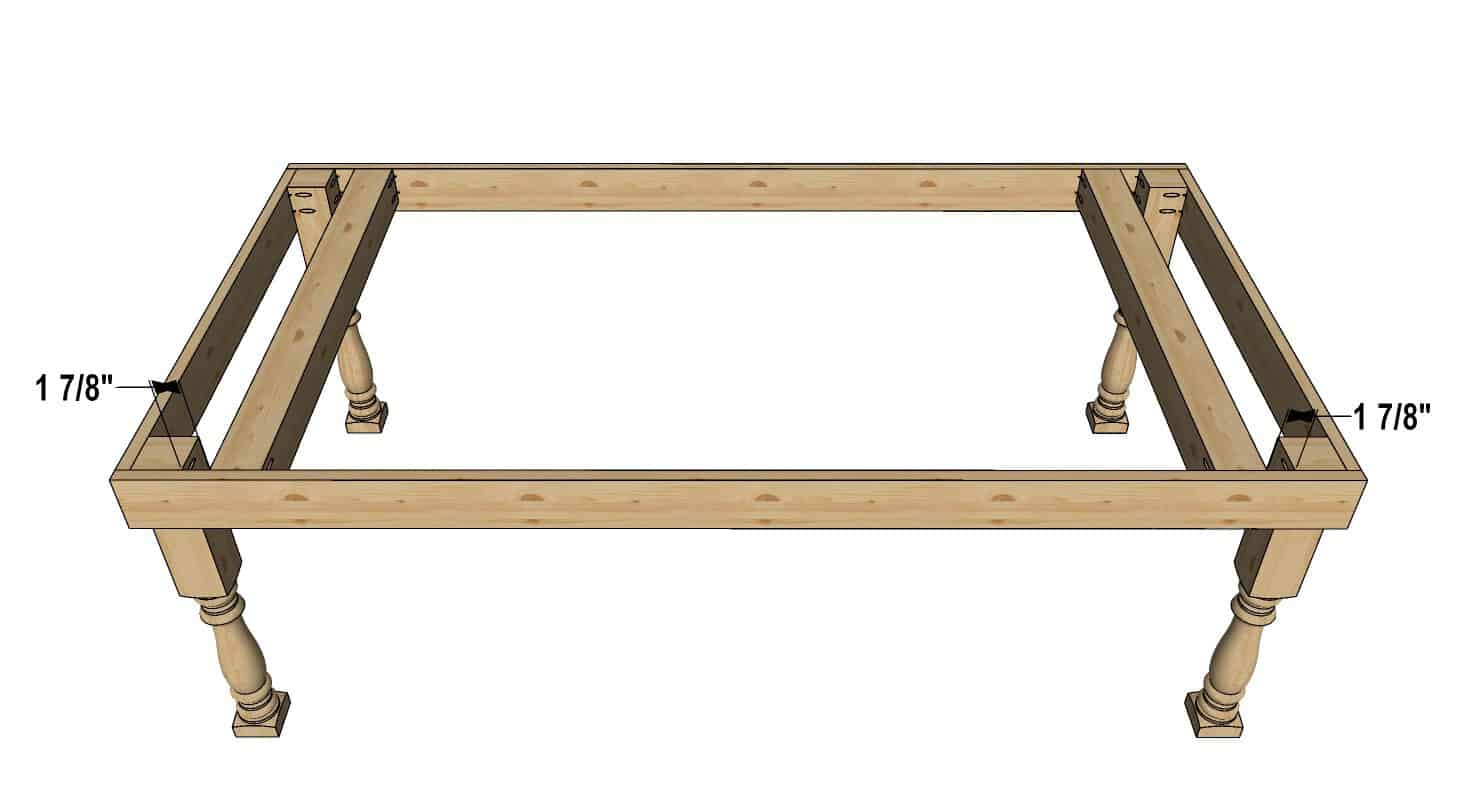
Once the table frame is standing stably, screw-in 2pcs 4”x4” pieces to the inside of the frame on each end of the table.
If only 3 legs are touching the ground, letting it sit overnight on a flat surface will let things settle out the way they should be.
There should be 1 ⅞” gap between the edge of the leg and the edge of the 4”x4” pieces.
Step 7
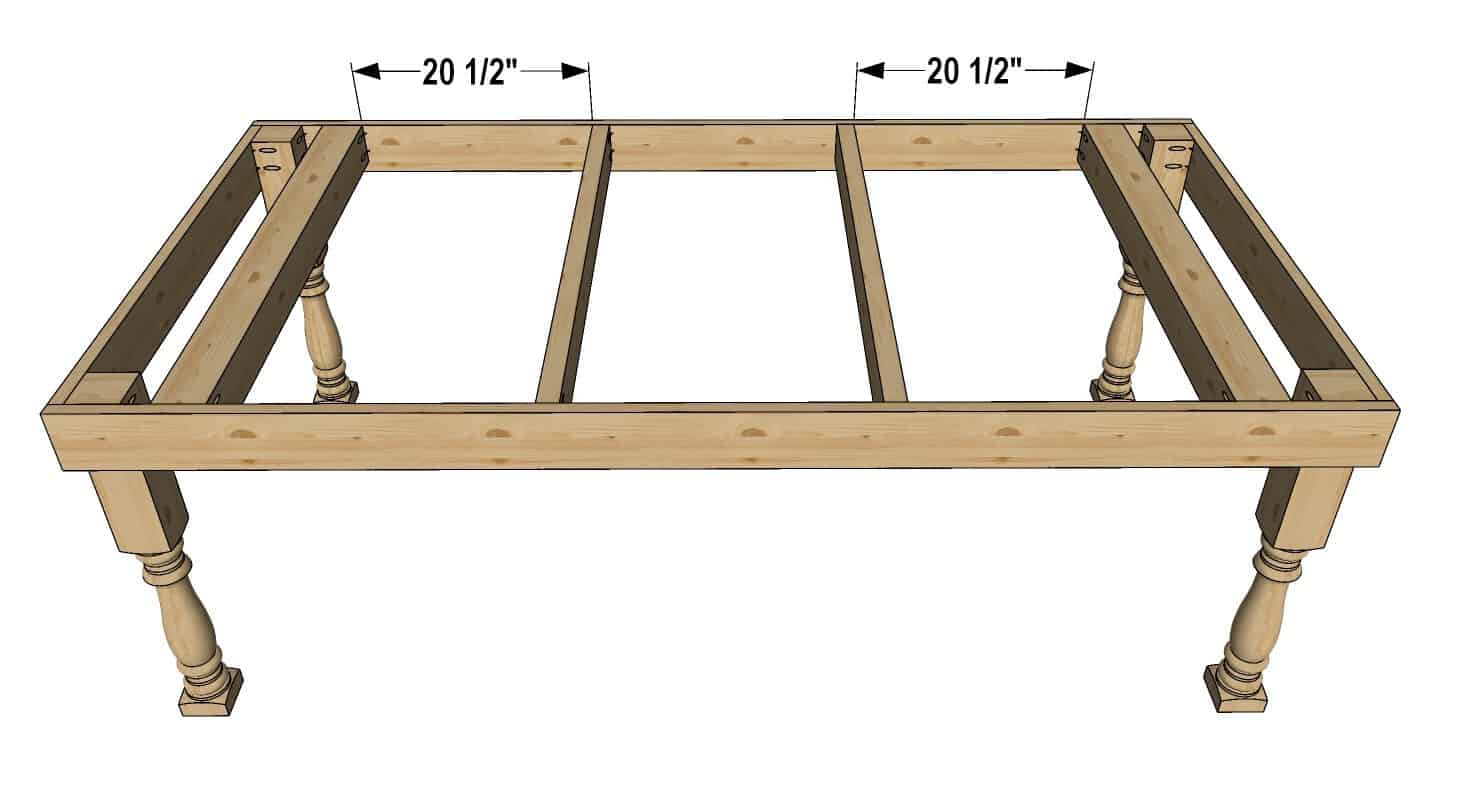
Screw in the middle supports for the table.
Use 2 pcs 2”x4”x42” pieces and attach them 20 ½” from the 4”x4” supports.
Step 8
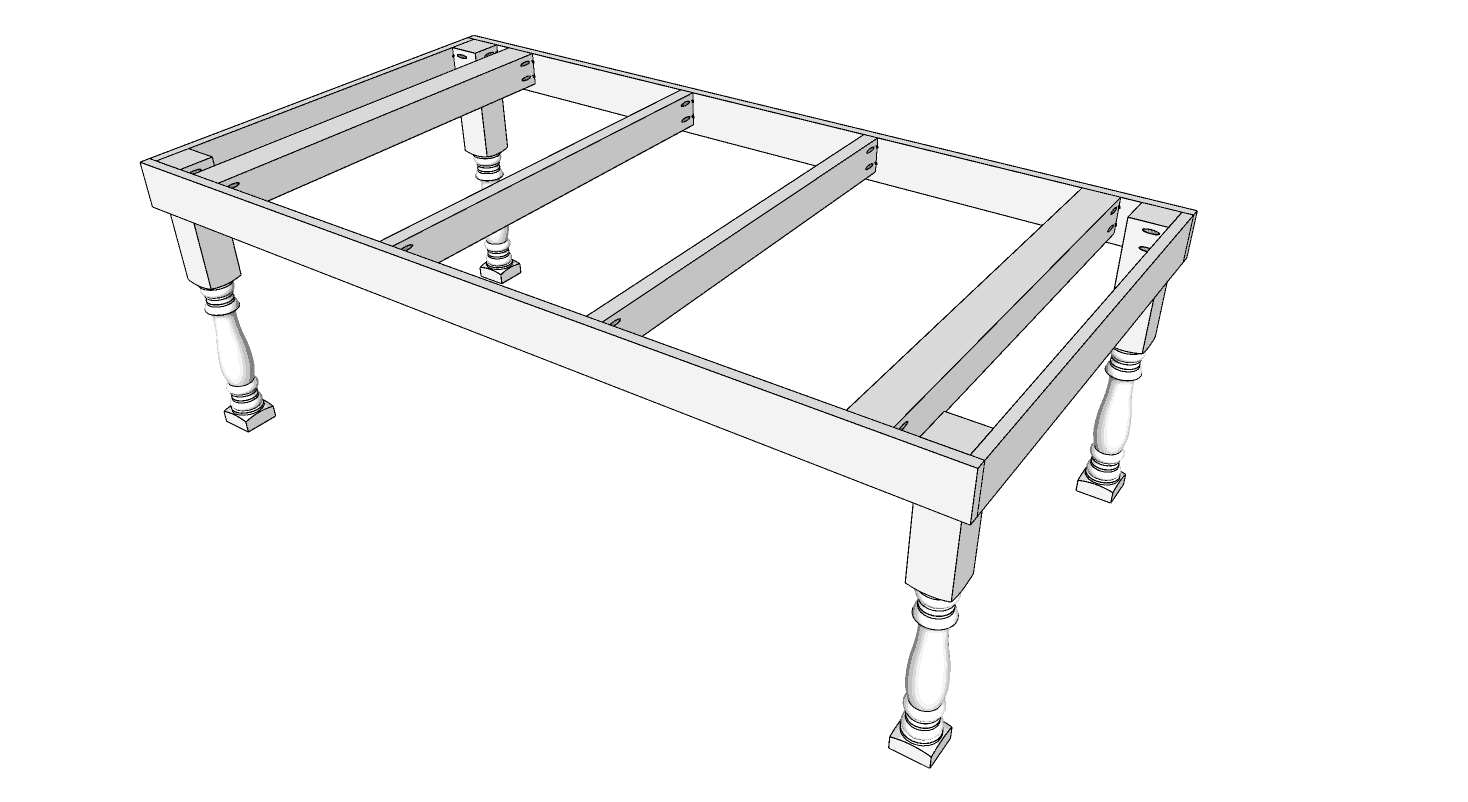
Now that the base of the table is completely done apply white or any other color wood paint you prefer to the base of the
table.
Step 9
Once the base is painted and dry its time to make the tabletop for the table. It will be made from 1”x10” boards.
In order to hide screw holes used to attach these boards to the tabletop, you will need to stain them in 2 steps.
First, stain all the edges of the boards and one surface boards as well.
Leave one surface of the boards unstained. This will become the tabletop at
the end and will be stained after the boards are put in place.
Step 10
Now that both the base of the table and boards for the tabletop are dry, screw all the boards to the frame using predrilled
holes.
First, take one of the 1”x10”x46 ¼” boards and place it stained side down so there is 1 ⅛” gap between the frame and the edge of the board both on the sides of the table and end of the table.
Make sure this first board is screwed in accurately. It will be used as a guide for all the rest boards.
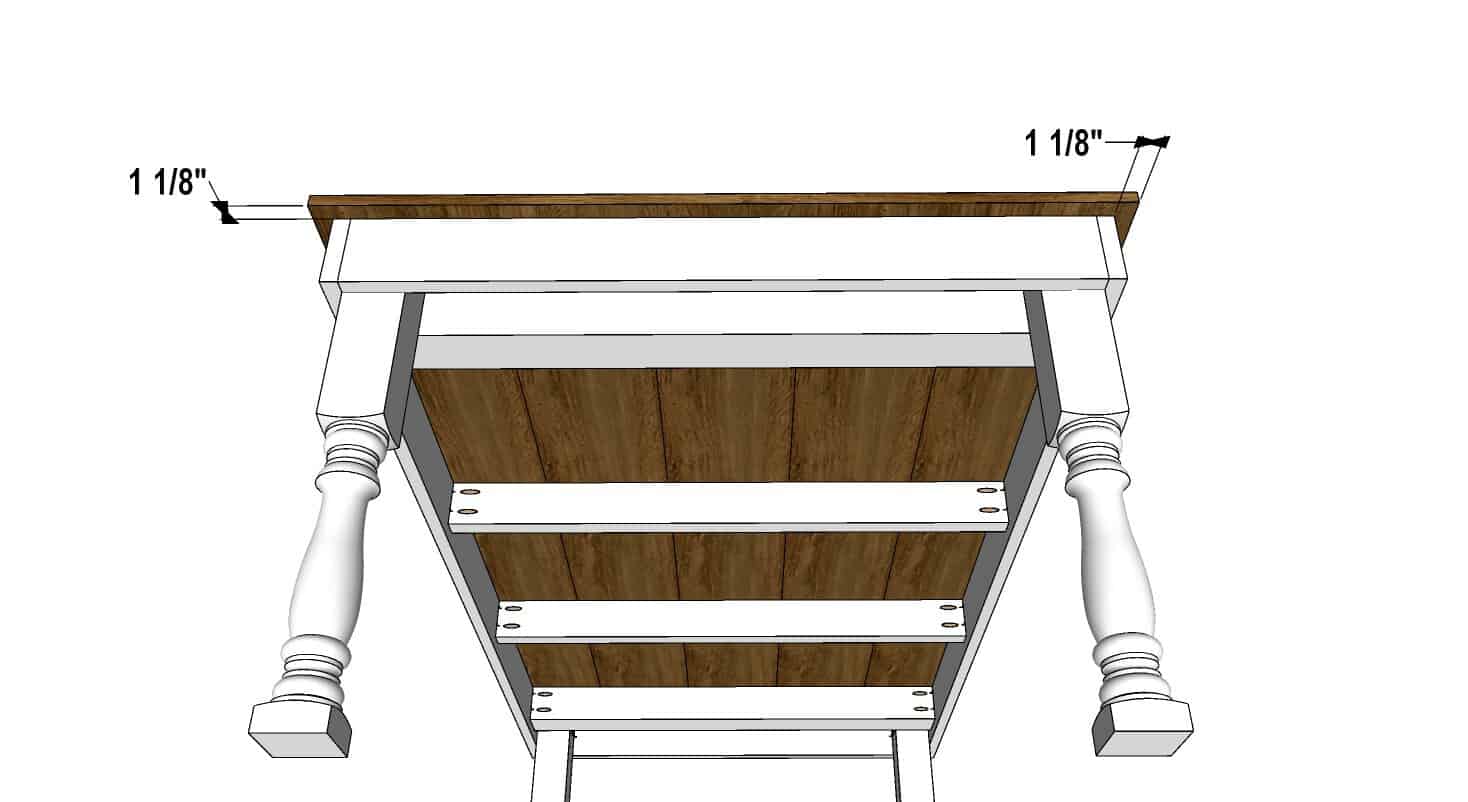
Using 5 pcs 1”x10”x60” boards, assemble the middle of the tabletop.
Take the first board and align it with the end board. Make sure the corners align perfectly and the board is straight.
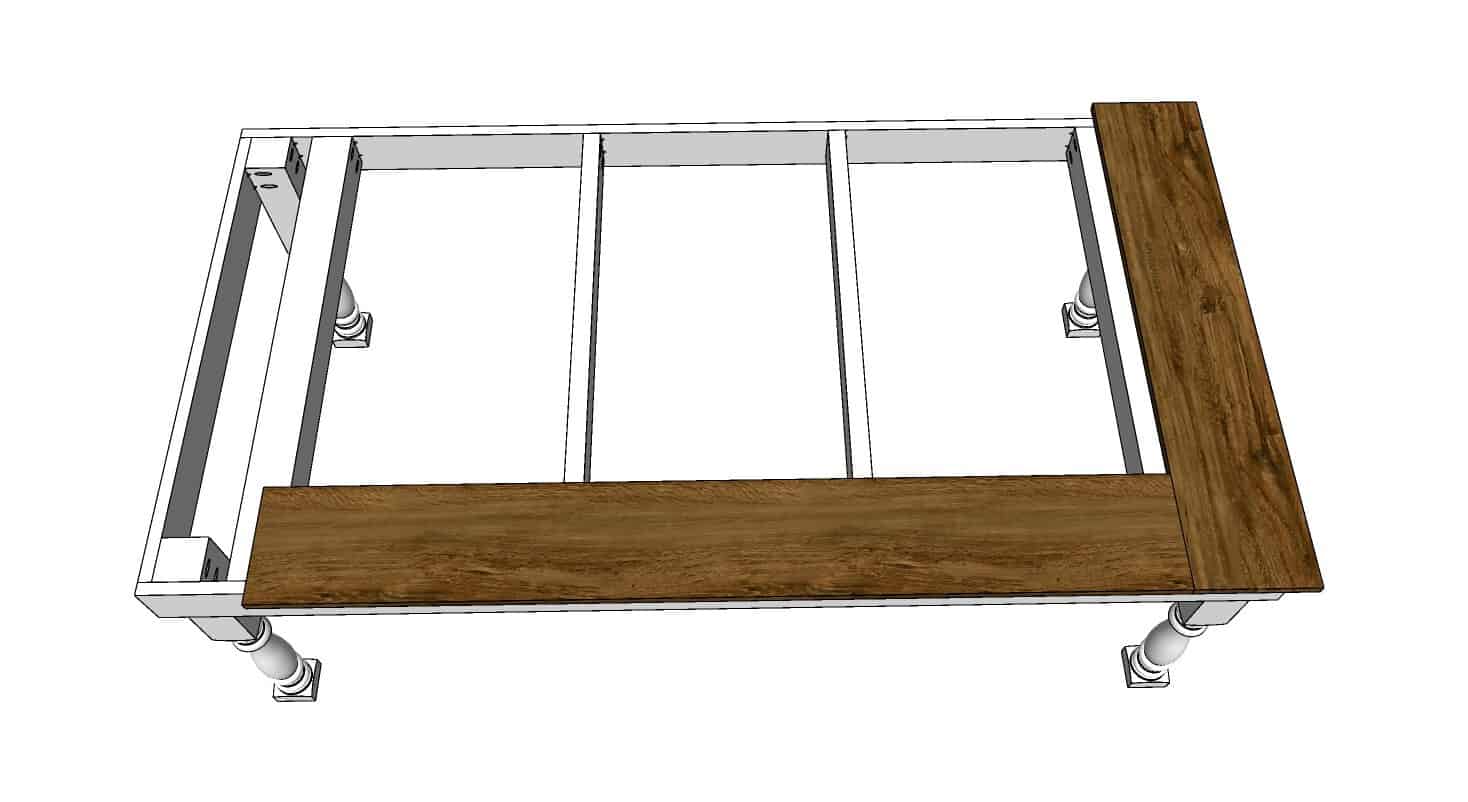
Once this board is screwed in place the rest 4 boards putting them right next to the two boards already attached.
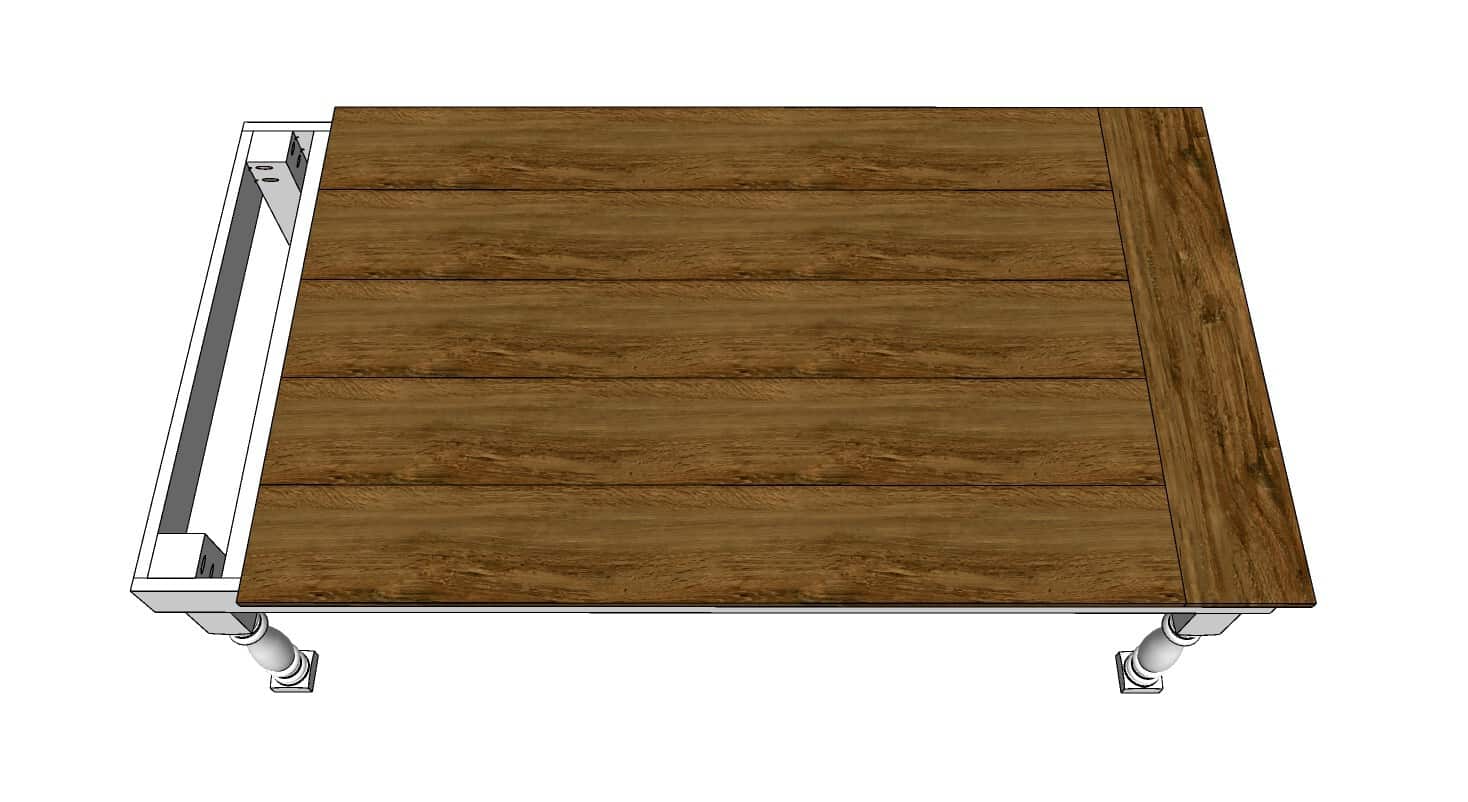
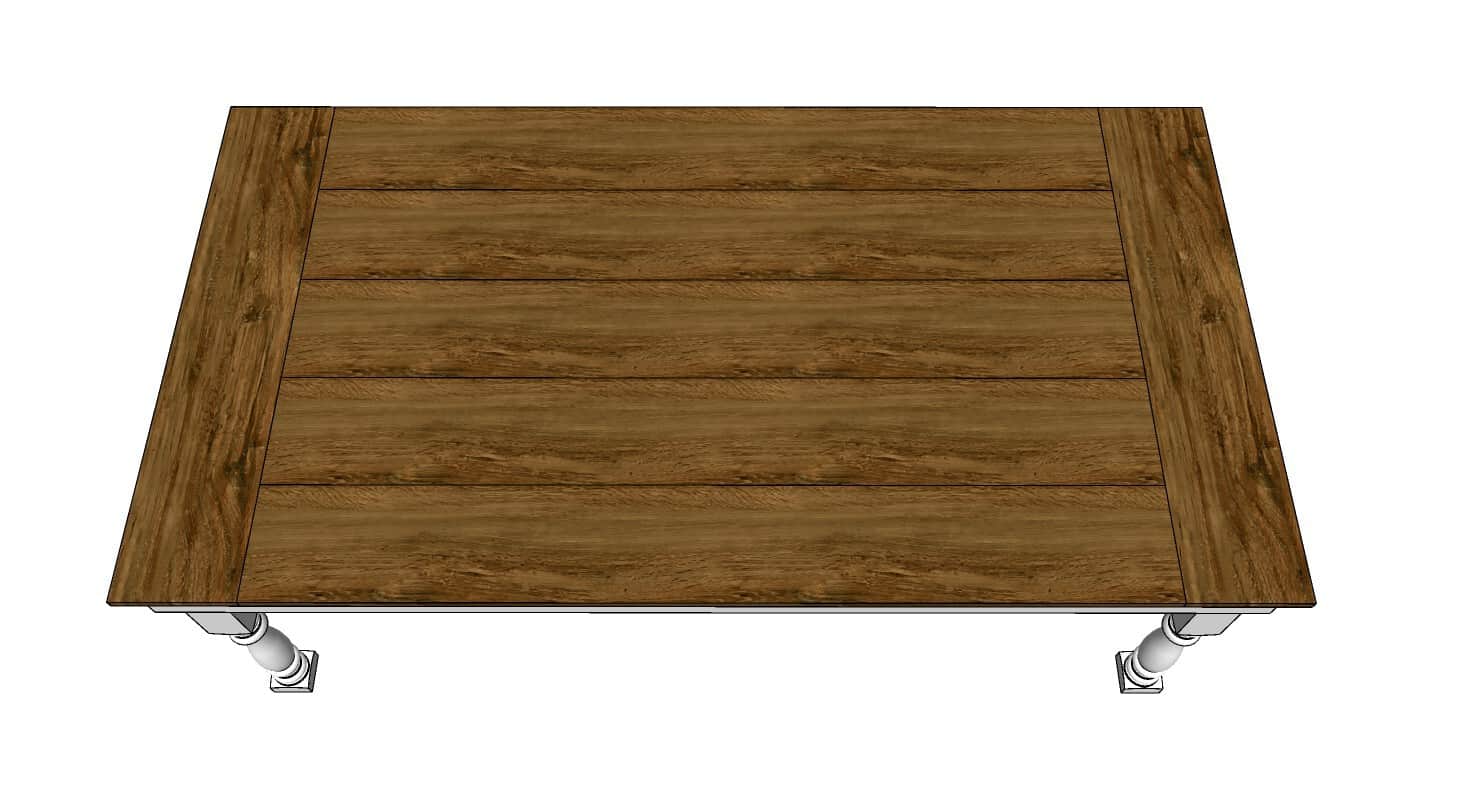
Lastly, take the remaining 1”x10” board and screw it in aligning its ends with the edges of other boards. Screw it in like the rest of the boards.
Step 11
Using wood filler, fill in all the screw holes left in the tabletop.
Let it dry according to the manufacturer's recommendations.
Step 12
Once dry, cover the base of the table with plastic and stain top part of the table using wood stain.
Step 13
After the stain dries you can apply a clear coat to the desired finish.
Notes
Be sure to glue each joint before screwing together.